

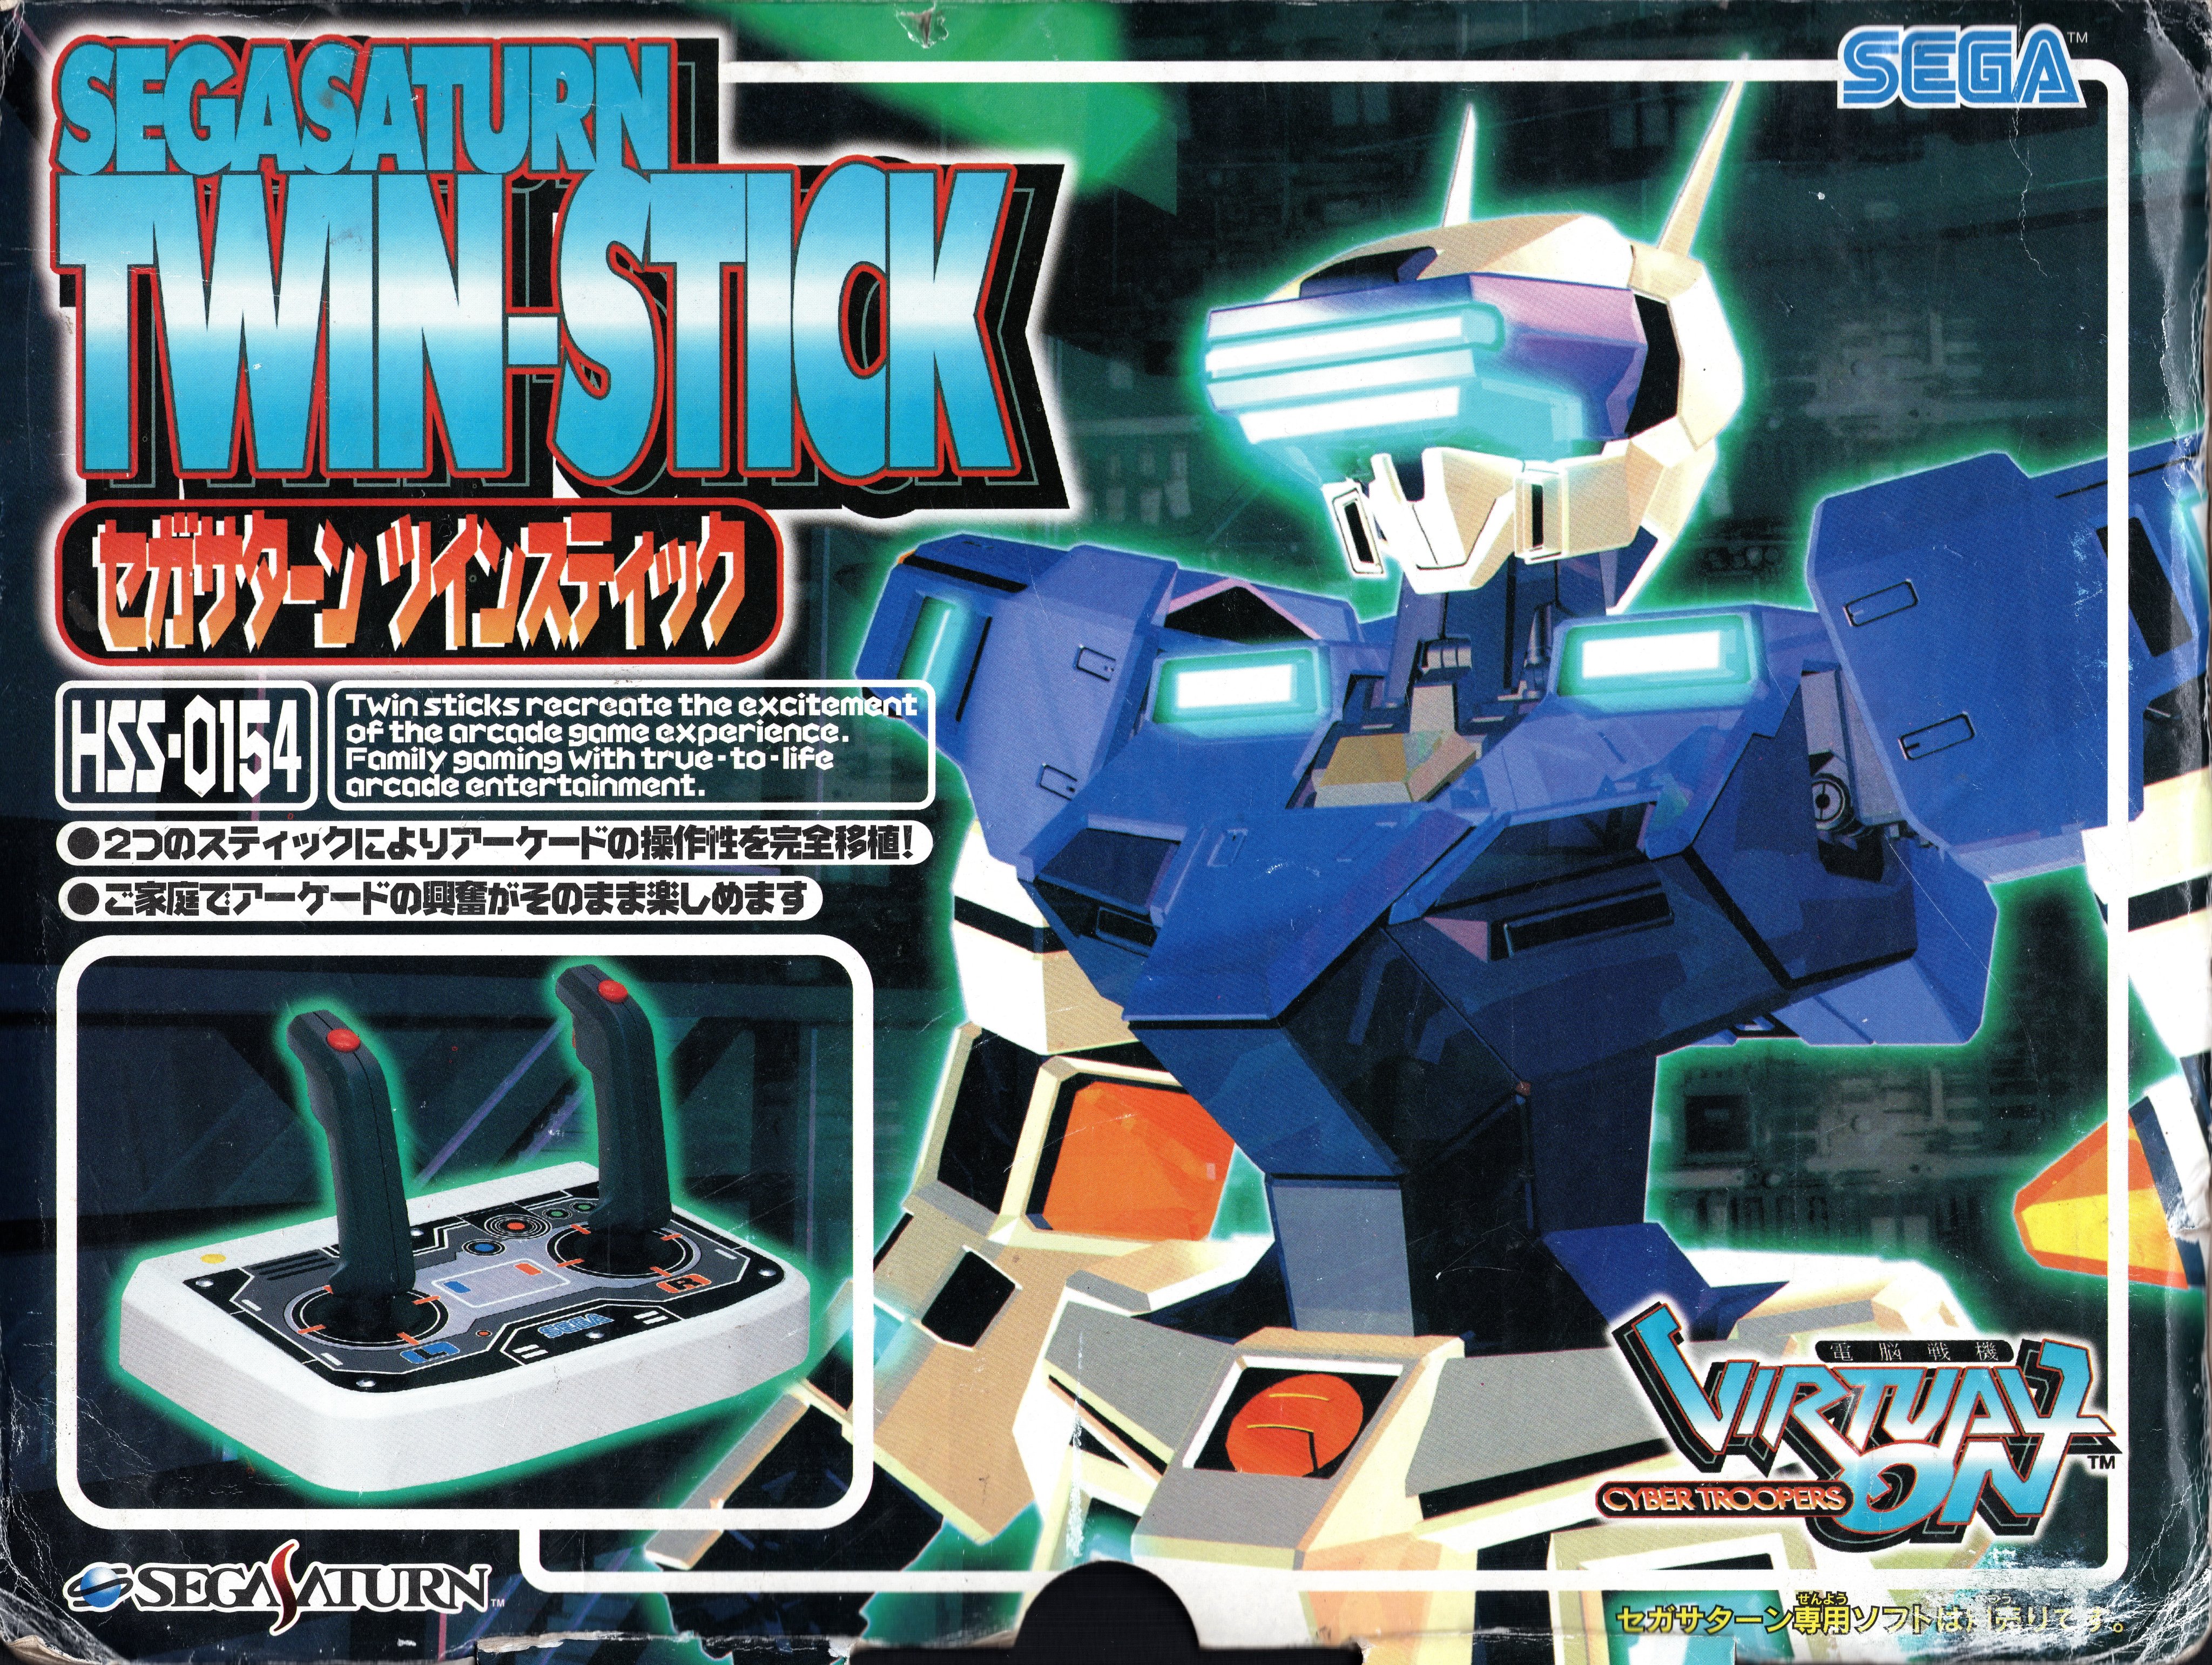
With all the Twin Sticks out there, the cheapest and most available one happens to be the Sega Saturn Twin Stick. While it’s not as desirable as the Dreamcast stick due to cheaper parts, it’s not as desirable as the Hori controllers, and it’s not nearly as expensive as the Tanita stick. What it is then? It’s an easy target for modifications, since it offers a solid base where you can either scratch-build Twin Sticks or just mod the existing innards to function on PC or PS4. Why these two? Because the PS3 emulator RPCS3 now supports all ports of Sega Model 2 games, including Virtua Fighter 2, and their online functions. The easiest and best way for you to access the arcade-accurate port of the original Cyber Trooper Virtual-On, and get your friends to try the series out (either because they’re cheap or don’t own a PS4.) PS4 is also the other target machine, as it has the Masterpiece collection, offering you the best legal way to access the three main Virtual-On games with no compatibility issues whatsoever. Sadly, this will not work on A Certain Magical Virtual-On, because it has no proper controller option to enable compatibility. The only Twin Stick that works on the game is Tanita’s.
The principle of this modification is as follows: Using Brook’s Universal Fighting Board we are able to use the Twin Sick on multiple platforms. We ditch the Saturn controller PCB for dead-simplicity. We could accommodate both PCBs and have a switch that retains the original Saturn compatibility, but we don’t. By wiring the controller’s cables to the right positions, we have a ready controller dedicated to Virtual-On as the games offer multiple controller setups, one of which uses the face buttons as Right Stick.
I’ve tried to make this as down-to-earth and simple as possible. However, due to possible variations in the Saturn Twin Stick cabling, I strongly recommend using a multimeter to check out what cable does what.
What you need for this mod is;
- HSS- 0151 Sega Saturn Virtual-On Twin Stick
- Brook Universal Fighting Board PCB with Pin connectors
- Some cable wire, e.g. Sanwa button harness cables
- A few jumper cables or a 4-pin button harness
- USB-A to USB-B cable
- Some extra momentary switch buttons. If you intend to play FORCE, it is recommended to get six pieces. I have installed four in these example pics.
- Screwdrivers, something to cut with, and other tools you might need
The setup shown here is a mess and should not be used as a direct reference. Please try out your own setup how you put down the Brook PCB and how you get each wire to its proper place.

Where to connect the Twin Stick’s wires, here’s a clear picture of the PCB from Brook’s own site.

Note that due to the Pin/Connectors being installed, L3 and R3 spots are covered.
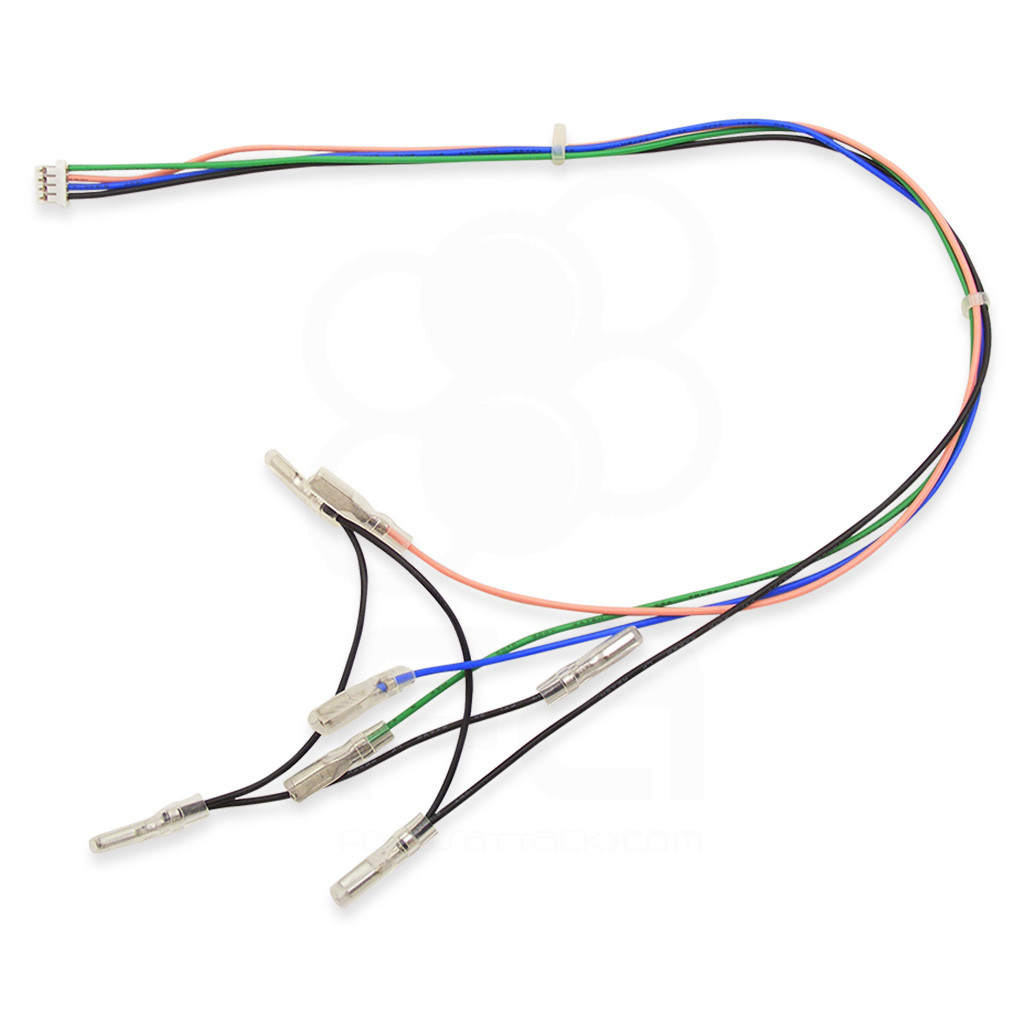
Some preparations need to be done before starting with the wiring, however. Detach the original Saturn controller PCB from the casing, and cut the wires from the connectors, so you have the maximum length of wire from the stick bottoms. You can either discard the PCB and the Saturn cable or save them for a later project. You can use the existing Start buttonhole for a button, or glue it shut. Create some kind of base for the PCB, so it doesn’t touch the metal plate.
Wires from the right side stick on the photo go to the following slots on the PCB;
- The five wires next to each other (Equals to L-Stick directions)
- Red to Left
- Orange to Right
- Brown to Up
- Black to Down
- Yellow to Ground
- The three wires coming from the bottom side of the right stick (These are the wires for the buttons on the Stick)
- Red to P3
- Brown to 4K
- Black to Ground
Wires from the left side of the photo go to the following slots on the PCB;
- The five wires next to each other (Equals to the Action buttons)
- Red to 4P
- Orange to 2K
- Brown to 2P
- Black to 1K
- Yellow to Ground
- The three wires coming from the bottom of the left stick
- Red to 4P
- Brown to 3K
- Black to Ground
You need to drill holes for the extra buttons on the controller case. I’ve chosen the top for aesthetics, and because I didn’t want to drill the steel plate the sticks sit in. Try what place works best for you. I’ve used four momentary switches with 12mm installation diameter for each. I’ve lined the buttons in a similar fashion as they appear on a PS4 controller. From Right to Left, they’re Start, Touch Panel, Select, and L3. I need to add two more for Home and R3 at some point. In the above photo of the insides, they’re of course reversed. Each of the buttons has its own place on the PCB.
However, L3 and R3 are the spots where you need to use those Jumper cables or the 4-button harness. This is why you need the Pin/Connector version, so you’ll avoid soldering. The rest of the buttons need those cables, like the linked Sanwa harness for easy installation. Use the legend below to check properly to which point to attach the jumper cables/ 4-pin harness.

Using the harness with its clip heads makes it easier to attach the cables to the buttons, but you need to find the proper buttons for that. You can use one common Ground for these buttons. If you look at the photo, I’ve daisy-chained them together.
When attaching the USB cable, be sure to loop it properly via the existing cable slot. Use some extra material to pad the hole, as the bottom metal plate may begin to chafe on the cable in the long run. Having some extra material around the cable here helps with this.
After you’ve finished with the wires and managed to test that all buttons work in your PC’s USB controller test suite, it’s time to boot up Cyber Trooper Virtual-On on either your PS3 or RPCS3 and set it up there. If you’re testing this on the emulator, change the controller setting as follows; Input Start, Select, and L3 as normal. For your left-hand stick, set it up as a normal L-Stick. The right-hand stick on the other has to be set up as follows; Up is Triangle, Left is Square, Down is Cross and Right is Circle. You can also assign it R-Stick. As for the triggers and thumb buttons; Right Trigger is R2, Left Trigger is L2, the Right thumb button is R1, and the Left thumb button is L1.
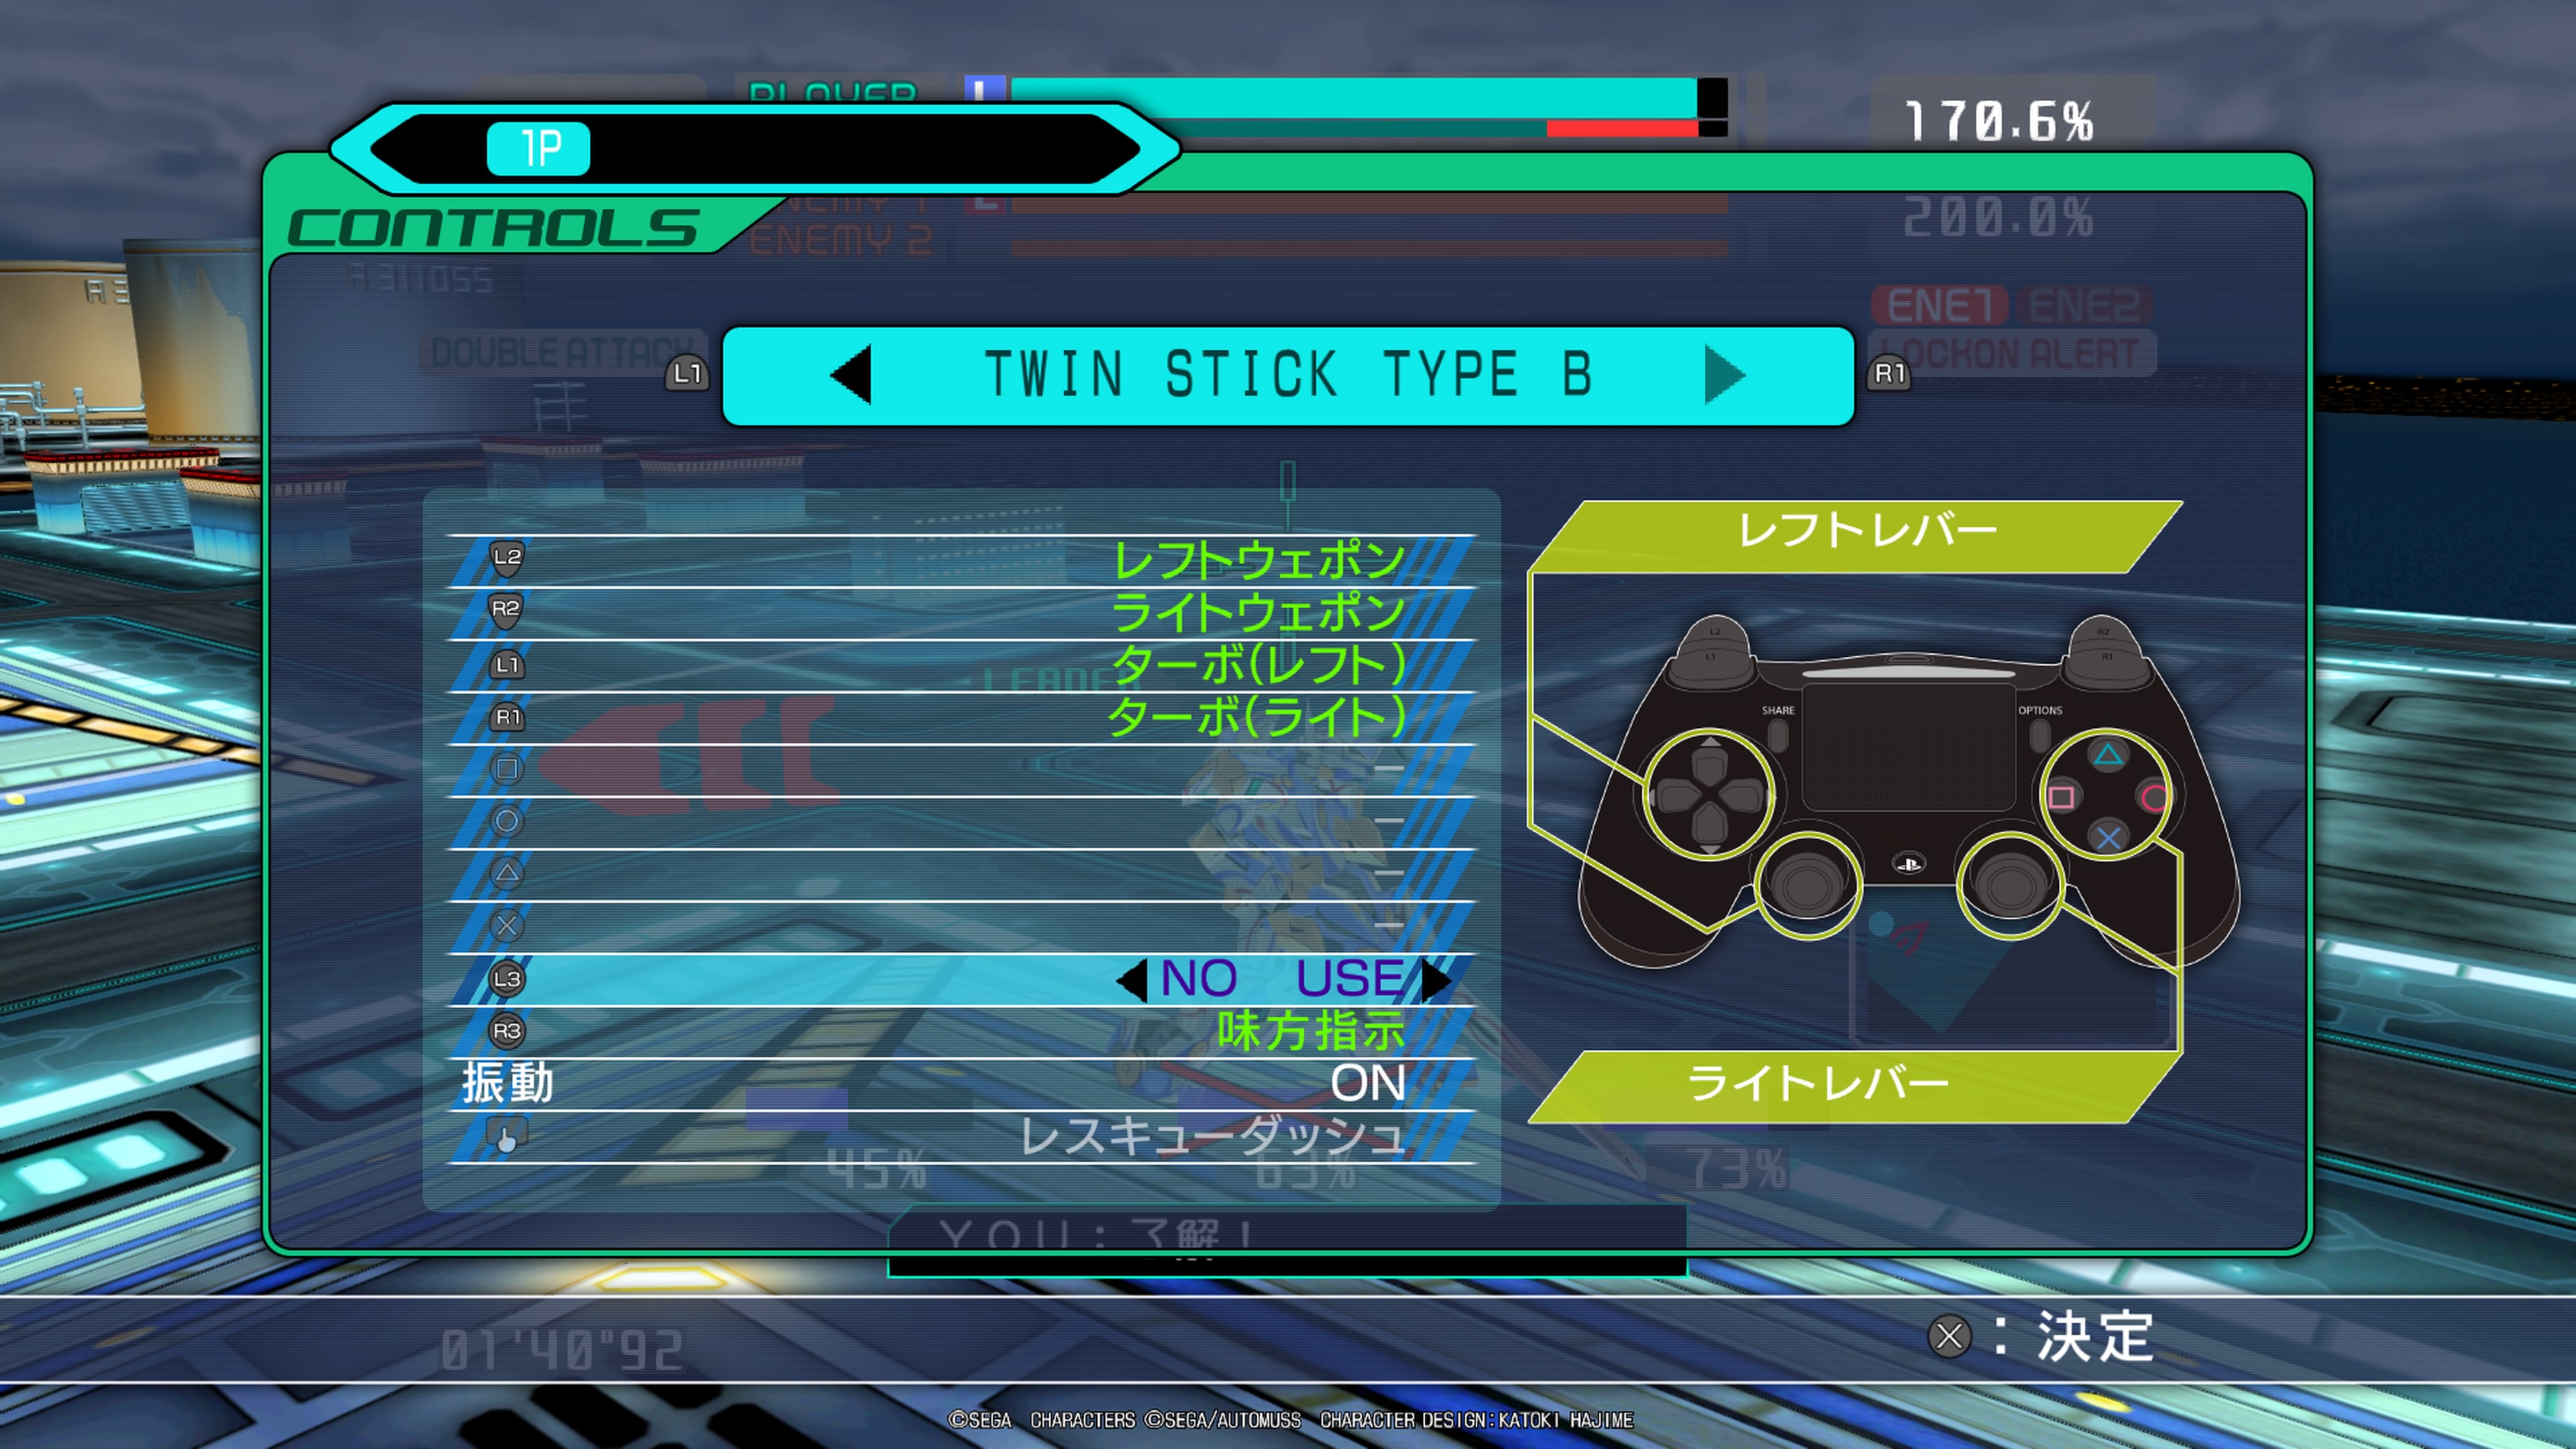
Whether or not you are running the game on real consoles or on an emulator, you need to change the control options as follows in the games’ menus for Twin Stick Type B. Here’s pictures for all three games and their setups for reference.
For Operation Moon Gate;

For Oratorio Tangram;
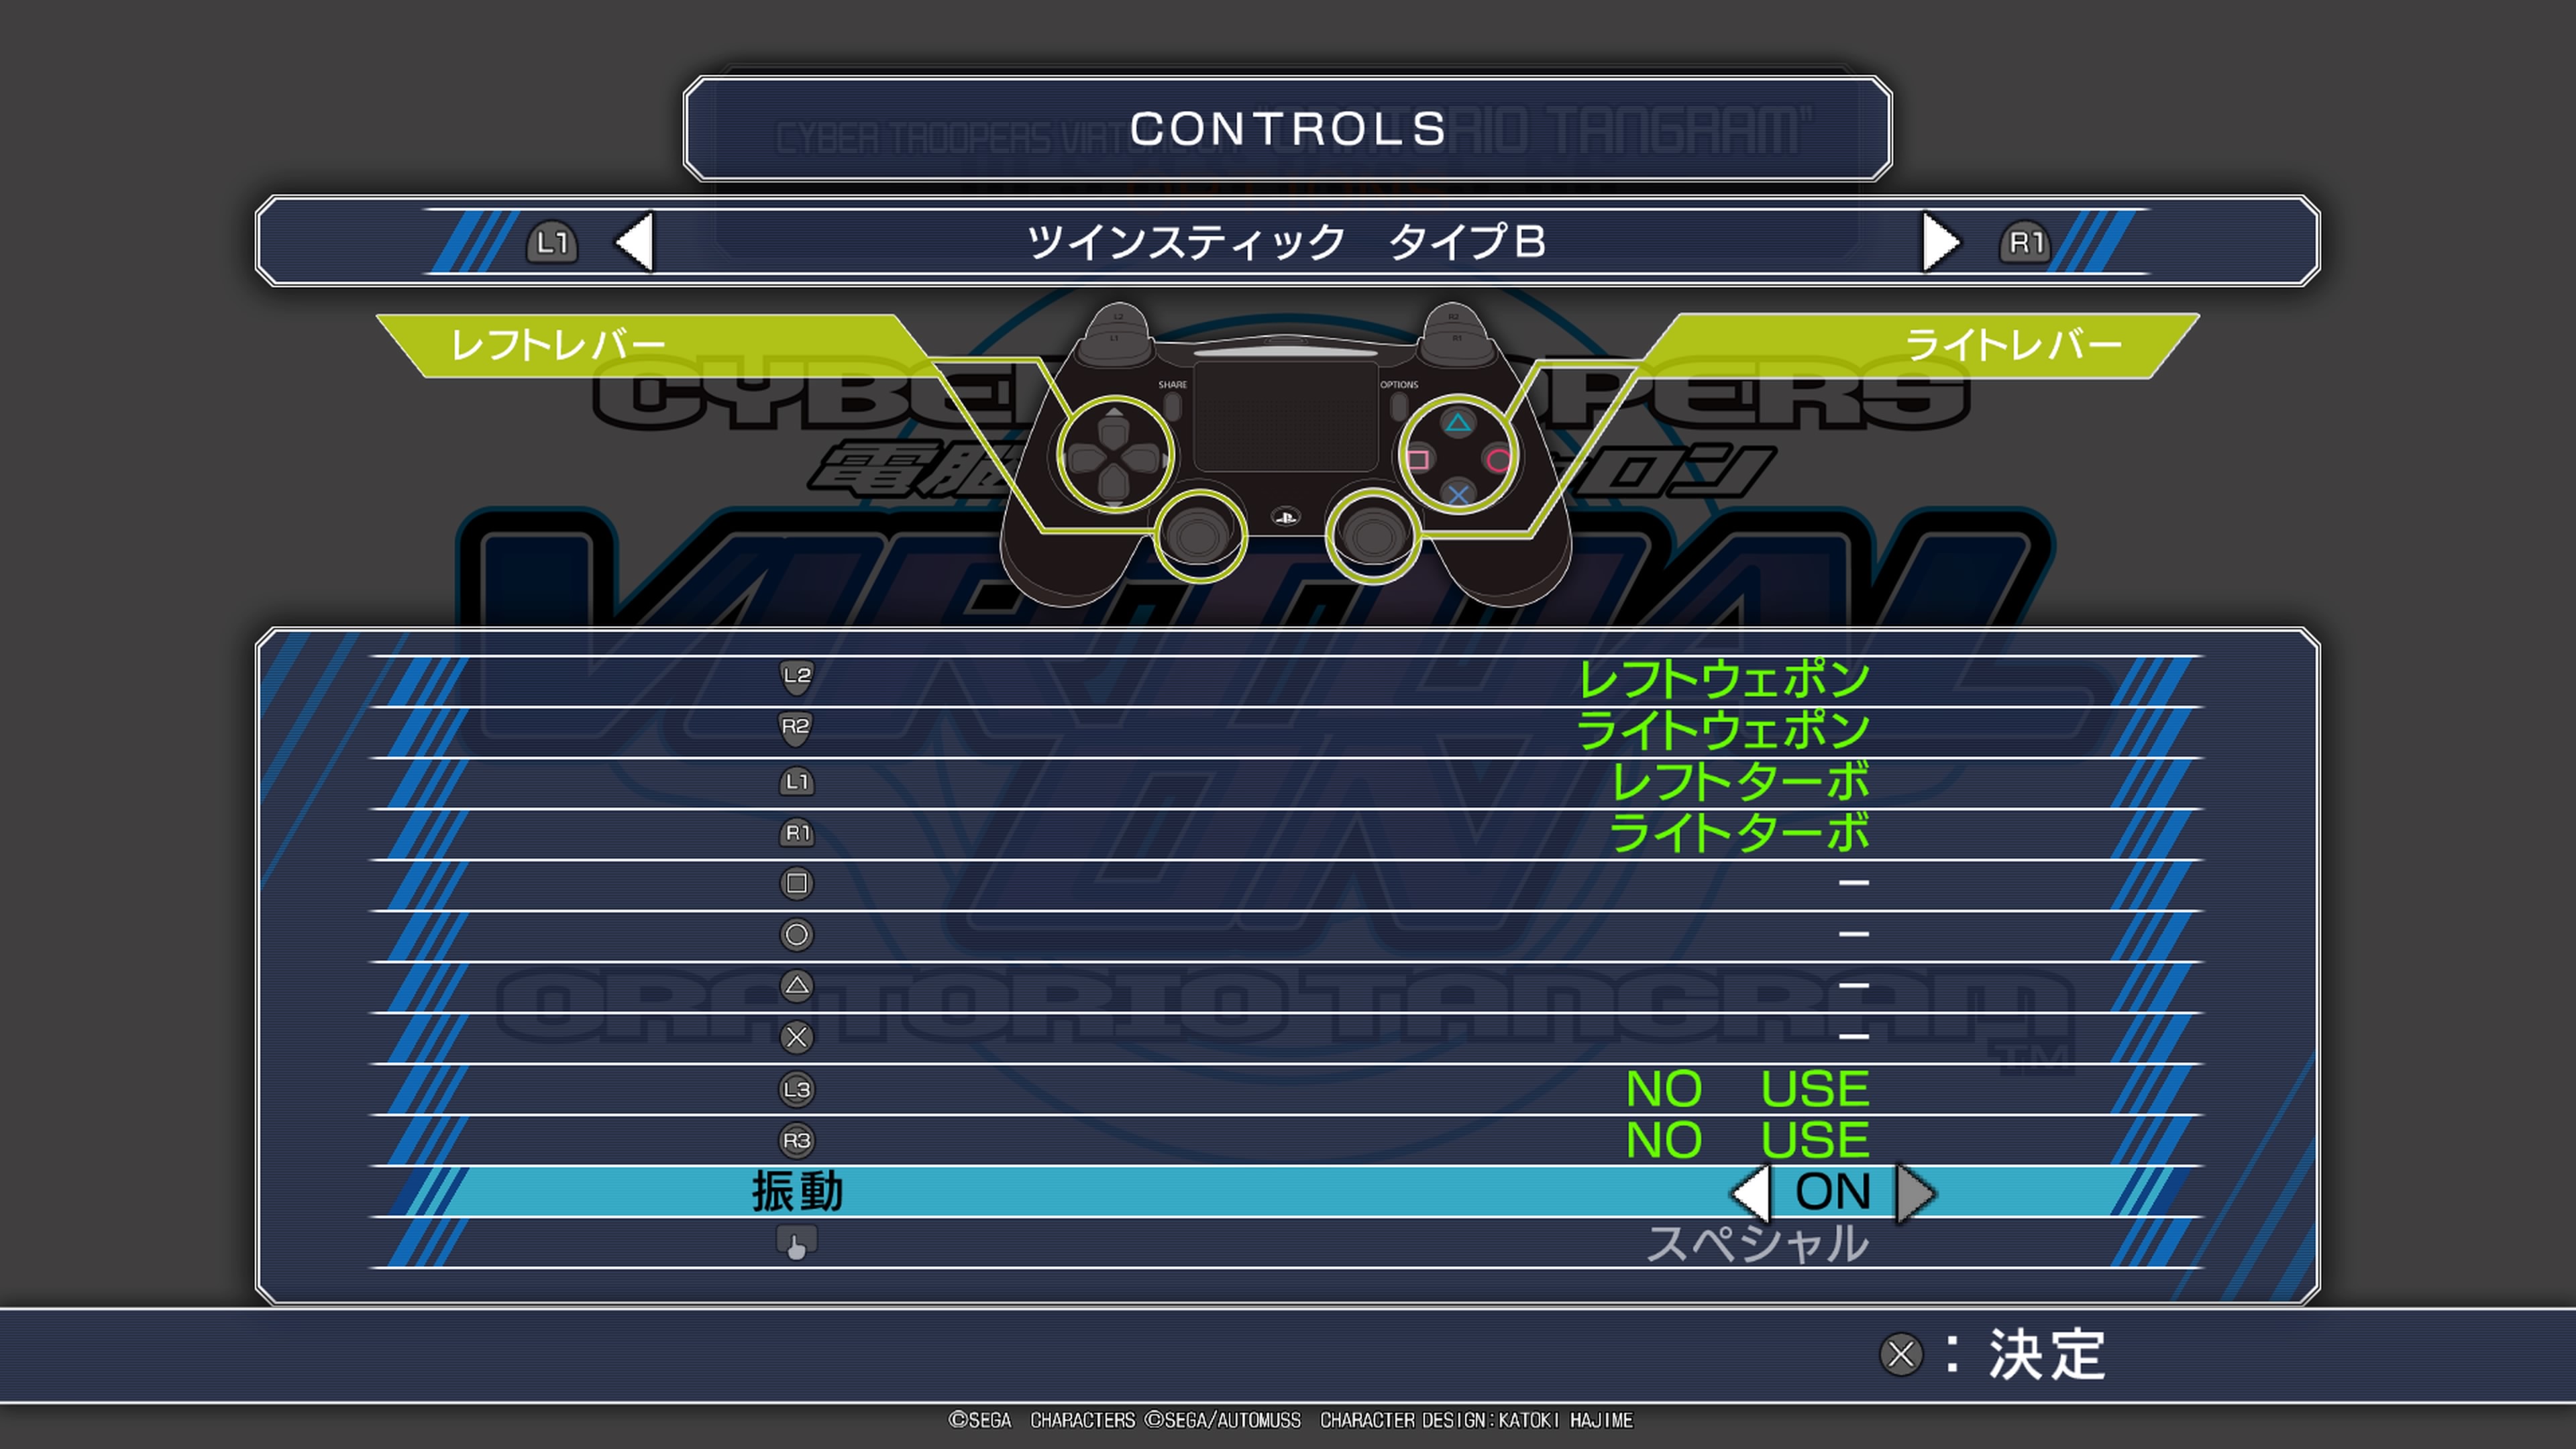
For FORCE, the controls need to be set up while in Practice mode or in Arcade mode, pause the game and access controls there;
Because the Brook PCB recognizes on what platform it is being used, it puts itself directly into PS3 or PS4 controller mode when used with those consoles. No need to worry whether or not the PCB goes into the right controller mode.
You can further modify your controller by taking the sticks apart and changing the actuators at the bottom for a pair of new arcade stick bases while using the existing shaft. You can also modify the thumb sticks to use tactile switches, but that would require a bit of soldering. In hindsight, you can modify the controller wholly with Brook’s own harness, but I had already started doing everything by soldering and cutting wires, so in my haste, I missed that point altogether. I’ll try to see if I can pick up a new Twin Stick down the line in some years and make a Version 2 with said harnesses.
The mod isn’t difficult, just takes a bit of time and is fiddly. You can also keep the Saturn side functioning, but that would require attaching switches that would change the ground and where the power in the system would be flowing. To keep things simple, I’ve decided to sidestep that altogether and make this a fully PC/PS3/PS4 compatible controller. You can also attach the expansion Brook offers to make it PS5 compatible.
